I was told that I was the
FIRST Golf R owner in the USA to have this splitter. Since I haven't seen anybody else on any forum, Facebook or otherwise stake that claim I'll say it's true...at least for now.
I bought this splitter from BK-Motorsports
buy lip here
here it is unboxed showing all it's CF goodness
Now first of all you do NOT need to remove the bumper. I only did for 2 reasons:
- I was planning on adding custom grill mesh to protect my ac condenser . More info here!!!
- I thought it to be easier to drill the holes having more working room vs from under the car and not fighting gravity or needing clamps or a helper
Tools needed:
- Ramps or Jackstands + lifting jack. Access to a lift is better only because it will be easier to get a drill under your car.
- T25 torx bit/driver
- drill
- 1/4 inch drill bit
- 2 10mm wrench, sockets, whichever to help you bolt things down
Get your front end lifted however you can. Remove the center plastic "undercover" that consists of 7 torx bolts. You'll need that removed so you can tighten up the inserted nuts.
Kerscher provides locking nuts (10mm), bolts (10mm), 2 sets of washers (small and large) and a 1 page confusing set of instructions. I decided to wing it instead. I didn't take pics but on the top side of the splitter you will see slight "dimples" which are your drill points. You'll need a 1/4 inch bit. These will work as guides when you drill into the bumper for your bolts.
I proceeded to drill 11 holes in the splitter. YIKES! poor carbon fiber!
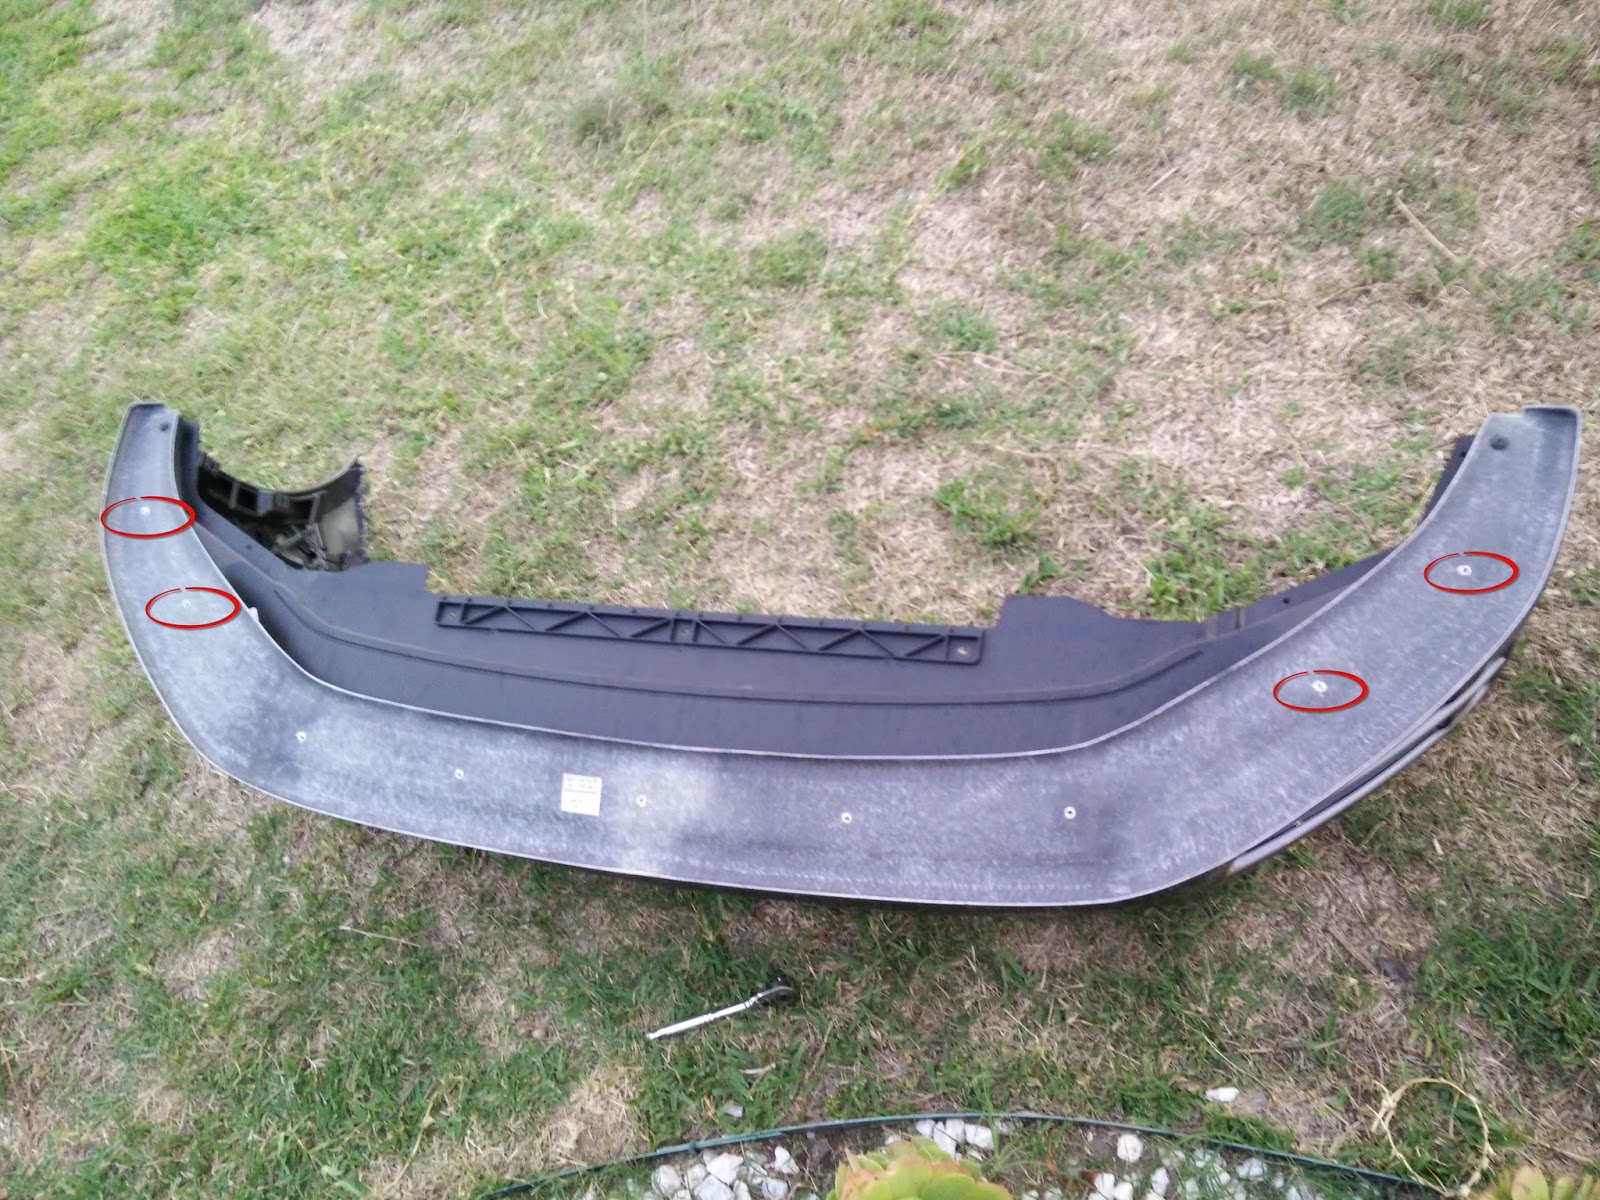
NOTE: After test fitting I found that 4 holes seemed off. If I drilled the bumper it would go into the painted part of the bumper and bolt in between that gap the splitter would be visible!
I circled the 4 holes in red below.
On the far corners of the bumper near the fender well there's a torx bolt. Remove that, place the splitter there then place the bolt back loosely (you add a supplied washer for more support). If you are working with the bumper still on the car you'll need some sort of clamp or helper to hold the center sections so the splitter doesn't flex. You may have a bad day if you don't do this. Alternatively some double tape as a temp holder would work if you're working alone.
Doing the above lines up the splitter in a perfect position. You now just have drill holes into the bumper using the existing splitter holes as a guide.
From the bottom you will add the larger washer to your bolt then insert into your holes. Add the smaller washer on the inside bumper then your locking nut. Tighten town with your 10mm tools. No need to kung fu grip tight them. Just really snug will work.
You can see above I didn't use the 4 outer holes because it would show the bolts. I eyeballed the single hole instead and drilled.
Once your bolted up, replace your under cover and get your R on the ground and enjoy your splitter!!!!
If you're interested in the grill mesh that's in the bumper, check out my other blog about it.
CLICK HERE to bumper grill mesh mod
 |
| CF baby! |
 |
| gratuitous side shot! |