Tuesday, August 25, 2015

Things I don't like about the Golf R

So I've had my R for close to 3 months and 3300 miles.

I like a lot of things about the R but there are some quirky things that I don't like but I've moved on accepting it is what it is.

  • the smallish radio display. Not only it's like an Atari like large pixel screen (like Pixels the movie) it's slow as well. The good thing I don't have navigation so it doesn't bother me too much BUT the 2016s have remedied this with a cleaner screen.
  • what's up the the old school fat ipod plug? I mean it's 2015. It's all about lightning plugs. I know the flat plugs aren't ancient but in technology it is. VW could have tossed in a free lightning cable or even better a female USB connector so we can choose what to plug in! Again 2016s have remedied that what a USB port.
  • inconsistent interior trim choices - I'm referring to the door panel and passenger dash having a carbon fiber panel but the center console and trim, the steering wheel and speedo cluster trim are piano black. I don't mind either. Just choose one!
  • The blue door panel / door sill lighting is a nice night time accent feature. They should have extended it to the rear doors.
  • The infamous locked center armrest - Forum members had to find a fix since it wasn't legal for VW to send a armrest that can open due to have a electronic emergency brake. Now I really don't use it for much but hey...make it solid if it's not an option here!
  • Knee room feels like owning a mini van. Luckily I don't move my legs much but I have to say being 6' 1" and my knees are really close to the front console. The steering column sits lowish too and I feel like I can straddle the column if I needed to. Perhaps I can close up my knees  on a curve?
  • For an almost $40k car why not have memory seats? The leather quality is high end and comfortable. There are plenty of other adjustments like lumbar. 
  • Last but not least. When you put the AC on max the small display says "LO"  That just seems lost in translation unless it means the lowest temp possible. It should have been "HI" or "MX"
Overall I still like the car and the comfortable seats. It's the little things.


Really? Who owns an old ipod/iphone for a new car?

Carbon Fiber and lights are nice

Mini van knee room

LO for Max AC. Really?


Thursday, August 13, 2015

JB1 overview get 35hp plus just with 4 plugs!!!

Just did my video of the JB1 overview.

It's not a how to install but pointing out things. The top 3 plugs will take you less than 5 minutes.

The bottom one is the bugger! I'm not sure who has wafer thin arms to get access to the top. After 10 minutes of trying to figure out where the heck was that plug I decided to go under which I should have in the first place.

The second challenge was removing the plug. I didn't recall the advice to actually push into the plug then loosen it as it forms some sort of vacuum.

Now for performance...woot!!! Talk about POWAH!

I recommend this product because of a few things:


  • plug n play - you can install it and not wait for a shop to install or uninstall
  • it's completely undetectable once removed. BMS has been in the game for several years on Bimmers and there hasn't been any issues on their latest products. Prior they used to solder so that made things more obvious to the watchful technician but not any more
  • It's priced nicely. This stage 1 tune runs about $400. Besides for a direct competitor of Neuspeed the other tunes (albeit ecu flash) run $600 or more. APR is one of the most popular and you'll be paying $800 plus possible labor. 
If you're in California, you Burger will not sell you this direct. Message me if you need help getting it here in Commifornia for "off-road" use of course.


Monday, August 3, 2015

Guard your grill!

Volkswagen for whatever reason didn't think that a rock could go through the center bumper grill and hit the AC condenser lines. I've read reports of this happening to several people in the VW and Audi forums. Since this wasn't considered a factory defect, owners who had this problem had to pay out of pocket for it in the range of $1000 or use their auto insurance policy claim and pay the deductible. If you look at the coolers in the side bumpers they put a nice plastic grill covering those lines but not anywhere in the large center area.

Damaged AC condenser. Pic courtesy of Bradd K.


Nicely protected side coolers


I swear a 2x4 could get in that area. I purchased a Kerscher carbon fiber front splitter (next blog how to) so I decided to do the grill mod. I went to Lowes and picked up what is called lath. It's galvanized steel mesh sheeting used for stucco applications. I chose galvanized for rust prevention.

TOOLS NEEDED


  • T25 torx bit - use a rachet, screwdriver or some sort of handle
  • Jack + ramps or jack stands - You could work on it from the ground but you won't have much space underneath
  • bucket or clamp - used to capture liquid from headlight washers or pinch it off.  
  • zip ties - I used long ones. easier to run them through existing openings. You can use short ones and extend them but more work.
  • wire cutter, heavy duty scissors, tin snips, or dremel to cut through your choice of mesh.
  • spray paint - I used Plastidip because I had leftover and it's great adhesion ability. P

TIME TO ALLOT - 1 to 2 hours depending how fast you can unscrew and screw everything.


To remove the bumper you will need a T25 torx bit. It's best to get the car on ramps or jack stands in the front. If you use jack stands you'll also have more room to get to the bolts in the fender well or you can turn the wheels on the ramps (BE CAREFUL DOING THAT).

There are 2 on top of the grill then you will pull the grill off.
2 screws on top edges


yanks straight up!
3 screws on each side under the fender. 2 on top and 1 on bottom


you can see the middle and bottom bolt here

this shows the top and middle bolt hole. top holds bumper to fender


7 screws on the bottom to remove the undercover (not pictured)


You need to pry off the bumpers from the side with some force. The front part of the bumper are held by clips that you simply slide it forward. Once you do you will see the headlight washer lines. Either pinch them with something or have a bucket ready because once you remove the hose, ALL the fluids will come rushing out. Ask me how I know this? The hose is easily removed by squeezing the blue buttons. Very easy.

headlight washer hose. you simply remove it.
pop the bumper off. you'll need to put a good amount of force


squeeze the blue bottons to remove from headlight washers. 


have a container ready or pinch off the line!


Going back to the mesh it cost $6 plus tax. It's a large sheet 26x97 inches I believe. I cut out a 44x9 inch rectangle. I'd suggest wearing thick gloves when cutting. I didn't and cut up my fingers. I painted it using my leftover Plastidip in black. I like that product since it doesn't need any form of primer to hold on too.  You can use whichever paint you like. You can also buy other types of grills if you prefer a different look.

Trim to fit then start zipping up. zip ties are very strong and used even to hold up bumpers. I love zip ties!


I used only long zip ties around the plastic area to hold down the grill. Some spots closes to the bottom corner of the grill I used openings that were 3-4 inches apart so I slid it down one side then used a pick to grab it out the other hole. You can see in the pic I just covered all the corners just to hold it down.


Trimmed mesh and ready to cut the zip ties

Install everything in reverse order...


You can see the final product and the oem grill in the side opening which VAG should have put there in the first place.

So for a Total of under $10 I have somewhat good protection. I'd guestimate my odds of getting through and damaging my condenser is are way way lower than without!!!!


Saturday, August 1, 2015

Kerscher carbon fiber front splitter install... yay baby!!!

I was told that I was the FIRST Golf R owner in the USA to have this splitter. Since I haven't seen anybody else on any forum, Facebook or otherwise stake that claim I'll say it's true...at least for now.

I bought this splitter from BK-Motorsports buy lip here

here it is unboxed showing all it's CF goodness


Now first of all you do NOT need to remove the bumper. I only did for 2 reasons:

  1. I was planning on adding custom grill mesh to protect my ac condenser . More info here!!!
  2. I thought it to be easier to drill the holes having more working room vs from under the car and not fighting gravity or needing clamps or a helper
Tools needed:

  • Ramps or Jackstands + lifting jack.  Access to a lift is better only because it will be easier to get a drill under your car.
  • T25 torx bit/driver 
  • drill
  • 1/4 inch drill bit
  • 2 10mm wrench, sockets, whichever to help you bolt things down


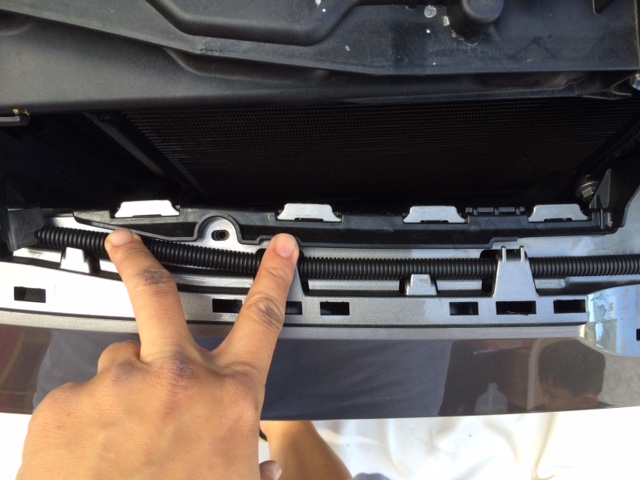
Get your front end lifted however you can. Remove the center plastic "undercover" that consists of 7 torx bolts. You'll need that removed so you can tighten up the inserted nuts. 

Kerscher provides locking nuts (10mm), bolts (10mm), 2 sets of washers (small and large) and a 1 page confusing set of instructions. I decided to wing it instead. I didn't take pics but on the top side of the splitter you will see slight "dimples" which are your drill points. You'll need a 1/4 inch bit. These will work as guides when you drill into the bumper for your bolts.

I proceeded to drill 11 holes in the splitter. YIKES! poor carbon fiber!

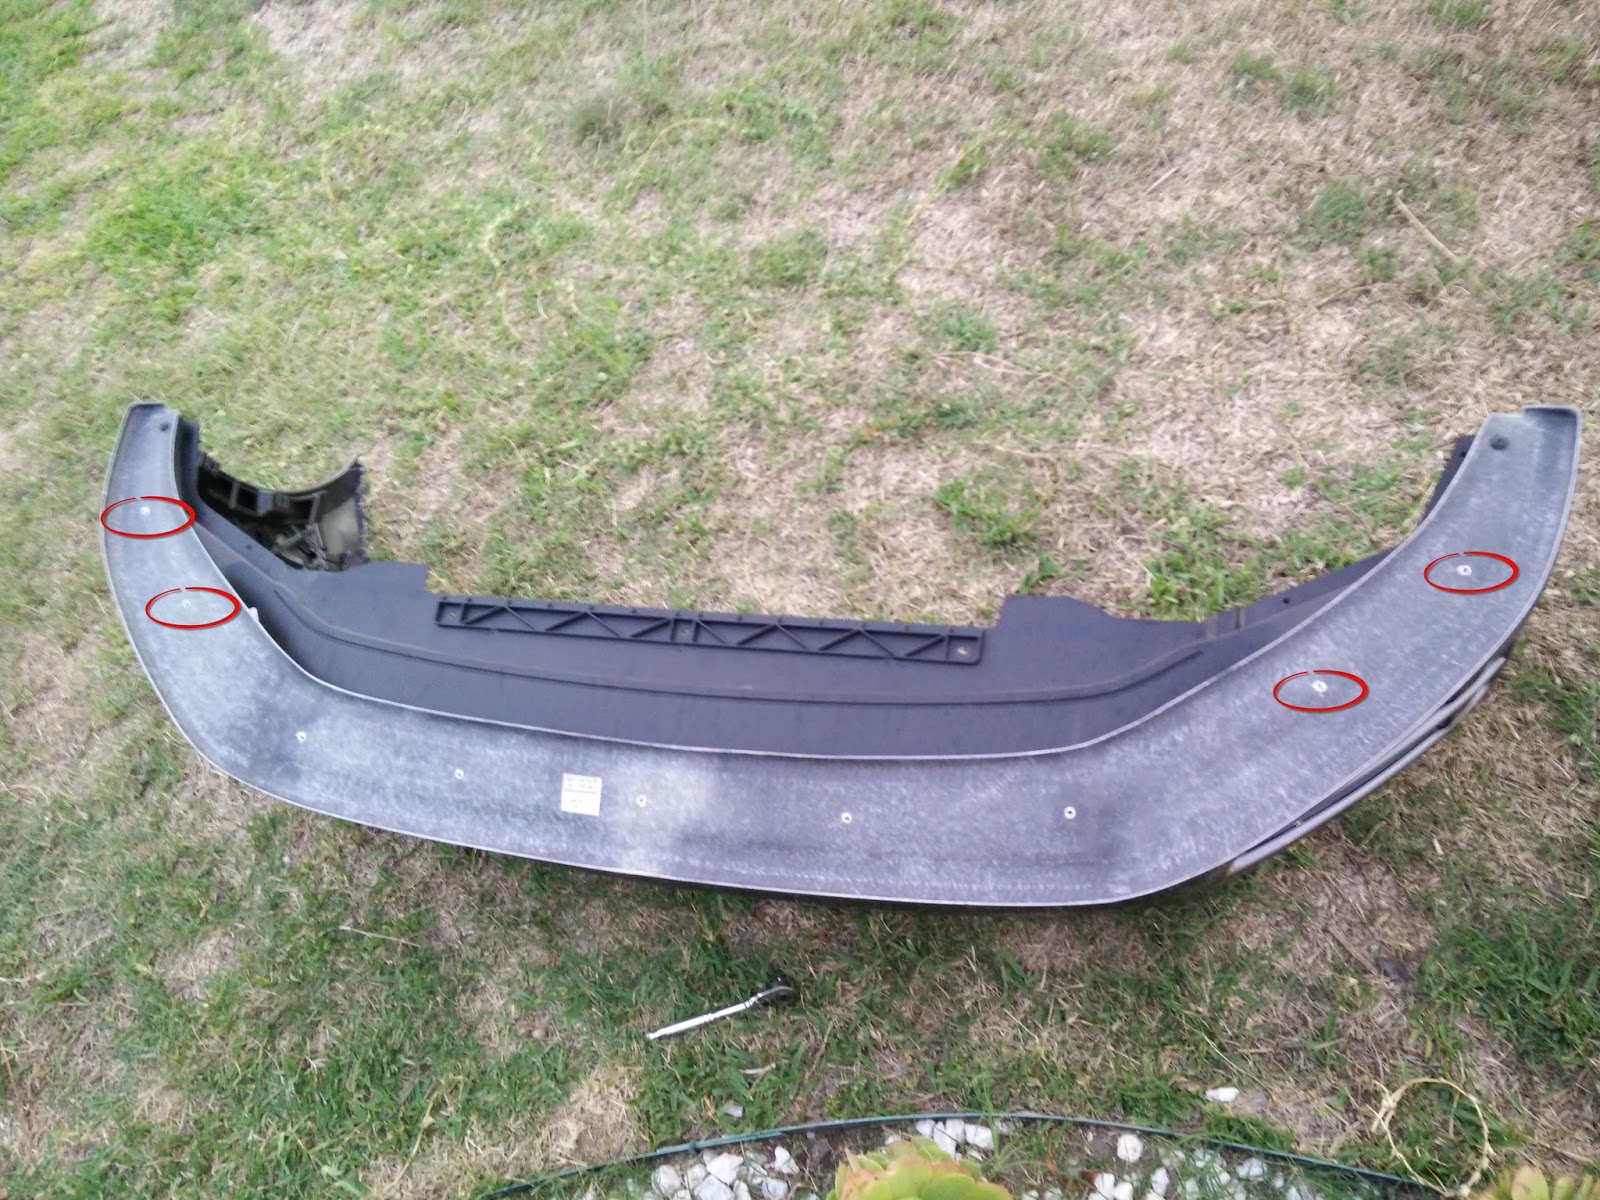
NOTE: After test fitting I found that 4 holes seemed off. If I drilled the bumper it would go into the painted part of the bumper and bolt in between that gap the splitter would be visible!

I circled the 4 holes in red below.
On the far corners of the bumper near the fender well there's a torx bolt. Remove that, place the splitter there then place the bolt back loosely (you add a supplied washer for more support). If you are working with the bumper still on the car you'll need some sort of clamp or helper to hold the center sections so the splitter doesn't flex. You may have a bad day if you don't do this. Alternatively some double tape as a temp holder would work if you're working alone.

Doing the above lines up the splitter in a perfect position. You now just have drill holes into the bumper using the existing splitter holes as a guide.

From the bottom you will add the larger washer to your bolt then insert into your holes. Add the smaller washer on the inside bumper then your locking nut. Tighten town with your 10mm tools. No need to kung fu grip tight them. Just really snug will work.


You can see above I didn't use the 4 outer holes because it would show the bolts. I eyeballed the single hole instead and drilled.


Once your bolted up, replace your under cover and get your R on the ground and enjoy your splitter!!!!

If you're interested in the grill mesh that's in the bumper, check out my other blog about it.

CLICK HERE to bumper grill mesh mod

CF baby!

gratuitous side shot!


Night shots of the LSG R - 50 shades of gray

Took some night shot pics and edited it in my old version of Lightroom 4

I used a tripod so I can run longer exposure. Besides cars, photography is another hobby of mine and hoping to go pro one day.

50 shades of gray. haha

I light painted this using my flash. You can see the reflections of the flash in the headlight.


Featured Post

My DIY splitter / lip for the R. Cheap mod!

Today I made my own splitter. I used my old Kerscher lip as a template to cut out some 1/4 inch ABS sheeting. Used my heat gun to make t...